How to Install a Garage Door Opener: A DIY Guide for Homeowners
Quick Comparison
| Product | Best For | Buy |
|---|---|---|
 Chamberlain B6765T Secure View (Best Overall) Chamberlain · Corded (120V AC) with battery backup · 48 lbs | Homeowners who want a premium, full-featured garage door opener | |
 Chamberlain B2405 (Best Value Belt Drive) Chamberlain · Corded (120V AC) · 40 lbs | Budget-conscious buyers who want belt drive quiet with smart features |
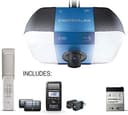
Chamberlain B6765T Secure View (Best Overall)
Homeowners who want a premium, full-featured garage door opener
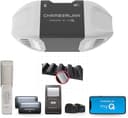
Chamberlain B2405 (Best Value Belt Drive)
Budget-conscious buyers who want belt drive quiet with smart features
If you're wondering how to install a garage door opener, here's the honest answer: replacing an existing opener is a solid DIY project. I think it's one of the most satisfying home upgrades you can tackle yourself. Installing one from scratch on a door that has never had an opener is harder, and in some cases you should call a professional. The difference comes down to whether the structural mounting points, wiring, and door hardware already exist.
A replacement install typically takes 4 to 6 hours if you've done some DIY work before. First-timers should budget a full day. I'd suggest blocking out a Saturday morning and giving yourself plenty of margin. Either way, you'll save $200 to $400 in labor costs by doing it yourself, and you'll understand exactly how your garage door opener system works when something needs adjustment later.
This guide walks you through every step of a DIY garage door opener installation, from gathering tools to programming your remotes and setting up WiFi connectivity. If you haven't picked out your unit yet, check our best garage door openers roundup for top picks across chain, belt, and screw drive models.
Before You Start: Is This a DIY Job?
Not every garage door opener installation is a weekend project. Here's how to decide.
Good candidates for DIY:
- Replacing an existing opener with a similar model (same drive type, comparable horsepower)
- Your garage already has a power outlet on the ceiling near the motor location
- The door is properly balanced and in good working condition
- You have a helper available for lifting the rail and motor unit into position
Better left to a pro:
- First-time installation on a door with no existing opener hardware
- Your garage door springs need replacement (torsion springs are under extreme tension and can cause serious injury). In my opinion, spring work is the one garage door job that should never be DIY.
- The ceiling structure is unusual or the garage has very low overhead clearance
- You need new electrical wiring run to the ceiling
If your door passes the balance test (disconnect it from any existing opener, lift it halfway, and let go; it should stay roughly in place), you're good to proceed. A door that slams down or flies up has a spring problem that needs professional attention before you install anything.
Tools and Materials You'll Need
Most of what you need comes in the opener box, but you'll want these on hand before you start.
Tools:
- Power drill with Phillips and socket driver bits. A quality cordless drill makes overhead work much easier.
- Adjustable wrench and socket set (common sizes: 7/16", 1/2", 9/16")
- Stepladder (6-foot minimum for standard garage ceilings)
- Tape measure
- Level (4-foot preferred)
- Stud finder
- Wire strippers and electrical tape
- Pencil for marking mounting holes
- Safety glasses
Materials (usually included with the opener):
- Garage door opener unit with rail sections
- Header bracket and fasteners
- Mounting straps or angle iron for ceiling attachment
- Door bracket (attaches to the top panel of the door)
- Straight and curved arm sections
- Safety reversing sensors with mounting brackets
- Wall-mounted control panel
- Remote controls
- Light bulbs (LED recommended to avoid radio frequency interference)
Materials you may need to supply:
- Lag screws or carriage bolts (if the included hardware is undersized for your ceiling joists)
- 2x4 lumber for a header board (if mounting above a finished wall)
- Cable staples or wire clips for routing sensor wires neatly
Critical Safety Warnings
Garage door systems involve heavy components and high-tension springs. Respect these rules throughout the installation.
Never touch torsion springs. The springs above your garage door store enough energy to cause severe injury or death. This installation guide assumes your springs are in good condition and properly adjusted. If a spring is broken, stop and call a professional.
Disconnect existing openers before doing any work. Unplug the power cord. If your garage has a dedicated circuit for the opener, turn off the breaker as well.
Lock the door in the closed position. Use C-clamps or locking pliers on the track just above one of the rollers. This prevents the door from being opened while you work. If someone opens the door while you're mounting hardware overhead, the shifting weight could knock you off the ladder.
Never work alone on the overhead steps. The motor unit weighs 25 to 40 pounds and the assembled rail can extend 8 to 10 feet. You need a second person to help lift and hold these components while you fasten them in place.
Wear safety glasses. You'll be drilling overhead, and metal shavings fall directly toward your face.
Step-by-Step: How to Install a Garage Door Opener
Step 1: Assemble the Rail
Start on the ground. Lay out all the rail sections on the garage floor and connect them according to the manufacturer's instructions. For chain-drive and belt-drive openers, this means sliding the rail sections together and threading the chain or belt through the trolley carriage. For screw-drive models, the rail comes as fewer pieces (sometimes a single section) with a threaded rod inside.
Attach the trolley to the rail and connect the chain or belt to it. Make sure the trolley moves freely along the full length of the rail before you lift anything overhead. this is where many first-timers skip ahead too quickly. Fixing a stuck trolley on the ground takes two minutes. Fixing one on the ceiling takes much longer.
Step 2: Install the Header Bracket
The header bracket is the anchor point where the rail meets the wall above your garage door. Measure the center of the door and mark it on the wall or header above the door opening. The bracket mounting height varies by manufacturer, but it's typically 2 to 3 inches above the highest point of the door's travel. Check your manual for the exact specification.
If your garage wall is finished drywall, you'll need to find the structural framing behind it or mount a 2x4 header board across the studs to give the bracket a solid connection point. The header bracket supports the full pulling force of the opener, so lag screws into solid wood are essential. Toggle bolts or drywall anchors will not hold.
Step 3: Attach the Rail to the Header Bracket
With the header bracket secured, lift the front end of the assembled rail and pin it to the bracket. Most systems use a clevis pin that lets the rail pivot slightly. Have your helper hold the back end of the rail (where the motor will attach) up near ceiling height while you secure the pin.
This is the most physically demanding part of the installation. A temporary support (a tall stepladder or even a stack of boxes) under the midpoint of the rail makes a huge difference while you work.
Step 4: Mount the Motor Unit to the Ceiling
With the rail now connected to the header bracket and held up by your helper or temporary support, position the motor unit at the back end of the rail. The motor should hang from the ceiling joists using the included angle iron brackets or perforated metal straps.
Use your stud finder to locate ceiling joists. The motor must attach to structural framing, not just drywall. If the joists don't line up with where the motor needs to sit, mount a 2x4 across two joists and hang the motor from that.
Check that the rail is straight and level. Use your 4-foot level along the rail. A slight downward slope toward the door (about 1/4 inch per foot) is acceptable and can even help with chain tension, but the rail should never slope upward toward the door.
Step 5: Attach the Door Bracket and Arm
The door bracket mounts to the top section of your garage door, centered horizontally. Use the hardware specified by the manufacturer. For insulated steel doors, the carriage bolts that come with most kits work well. For wood doors, lag screws provide a stronger hold.
Connect the straight and curved arm sections to form the door arm. Attach one end to the door bracket and the other end to the trolley on the rail. The arm should be straight (not angled sharply) when the door is closed. If the arm angle is too steep, the motor works harder and the hardware wears faster.
Step 6: Install the Safety Reversing Sensors
Federal law requires all garage door openers manufactured after 1993 to include safety reversing sensors. These are two small sensors (one sends an infrared beam, one receives it) that mount on either side of the garage door opening, no more than 6 inches above the floor.
Mount the sensor brackets to the door track or the wall beside the track. Position both sensors at exactly the same height. Even a quarter-inch difference can cause alignment problems.
Run the sensor wires along the wall and ceiling to the motor unit. Use cable staples every 12 to 18 inches to keep wires tidy and out of the way. Connect the wires to the terminals on the motor unit. Most systems use color-coded terminals: white wires go to the white terminals, and black and white striped wires go to the gray terminals. Double-check your manual because miswired sensors will not function.
Step 7: Wire the Wall Control Panel
Mount the wall control button inside the garage, near the door that leads into your house. Position it at least 5 feet above the floor so small children can't reach it. Run the two-conductor wire from the wall button along the wall and ceiling to the motor unit. Connect the wires to the designated terminals on the back of the motor.
Step 8: Set the Travel Limits
Plug in the motor unit. Before testing with the remote, you need to set the up-travel and down-travel limits. These tell the opener exactly how far the door needs to move in each direction.
Most modern openers have two adjustment screws (or buttons on a digital panel) labeled "Up" and "Down." Press the wall button to close the door. If the door doesn't close fully, increase the down-travel limit. If it closes past the floor and the motor strains, decrease the down-travel limit. Repeat for the up position: the door should open completely without the arm slamming against the motor housing.
Getting these limits dialed in usually takes 3 to 5 test cycles. Be patient. I think this is the single most important step in the entire garage door opener installation. Incorrect limits are the number one cause of "my new opener doesn't work right" complaints.
Step 9: Adjust the Force Settings
Separate from the travel limits, the force settings control how much resistance the motor applies. There are two force adjustments: one for opening and one for closing.
Set both to the minimum force that still operates the door smoothly. Excessive force defeats the purpose of the safety reversal feature. To test the close force, place a 2x4 flat on the ground under the door and press the close button. The door should reverse immediately upon contacting the board. If it doesn't, reduce the close force.
For the open force, grab the bottom of the door while it's opening and apply light resistance. The opener should stop. If it doesn't, reduce the open force setting.
Step 10: Align the Safety Sensors
With the sensors wired and the motor powered on, check the indicator lights on each sensor. Most systems use a solid green LED on the receiving sensor and a solid amber or green LED on the sending sensor. If either light blinks, the sensors are misaligned.
Loosen the wing nuts on the sensor brackets slightly and aim both sensors directly at each other until both LEDs show solid. Tighten the brackets gently. Overtightening warps the brackets and causes repeat misalignment problems, especially as temperatures change with the seasons.
Test the sensors by pressing the close button, then waving your hand through the beam path about a foot off the ground. The door should reverse immediately. Test this at least three times. Sensors that pass once but fail on a second attempt need further adjustment.
Step 11: Program the Remotes and Keypad
Follow the manufacturer's instructions to pair your remote controls and exterior keypad (if included). The process usually involves pressing a "Learn" or "Program" button on the motor unit, then pressing the corresponding button on the remote within 30 seconds.
If you're replacing an old opener, reprogram all remotes and keypads. Don't skip this step. Your old opener's frequency and codes should not remain active, as anyone who had access to those old remotes could potentially open your garage.
Chain Drive vs Belt Drive vs Screw Drive: Installation Differences
The step-by-step process above applies to all three drive types, but there are a few differences worth knowing before you start.
Chain drive openers are the most common and the least expensive. The rail assembly takes a bit longer because you need to thread the chain through the trolley and adjust the tension. Too much slack in the chain causes slapping and noise. Too tight and it wears out the sprocket prematurely. Most manufacturers recommend about 1/2 inch of sag at the midpoint of the rail. Chain drives also require periodic lubrication with white lithium grease.
Belt drive openers install almost identically to chain drives, but with a reinforced rubber belt instead of a metal chain. Belt tension is less fussy than chain tension, and you don't need to lubricate it. Belt drives are significantly quieter, which matters if you have a bedroom above or adjacent to the garage. I recommend belt drive for most homeowners. The noise difference is dramatic, and the tradeoff is modest: belt drive openers typically cost $30 to $80 more than comparable chain drive units.
Screw drive openers have the simplest rail assembly because there's no chain or belt to thread. The trolley rides directly on a threaded steel rod inside the rail. Installation is slightly faster, and the compact design works well in garages with limited headroom. The downside: screw drives can struggle in extreme temperatures. If you live in a climate with harsh winters or brutal summers, a chain or belt drive is more reliable year-round.
Setting Up Smart Features (WiFi, App Pairing)
Most garage door openers sold today include built-in WiFi or support an add-on smart module. Chamberlain and LiftMaster use the myQ platform. Genie uses the Aladdin Connect system. Here's the general setup process.
Step 1: Download the app. Install the manufacturer's app (myQ, Aladdin Connect, or the brand-specific app) on your smartphone before you begin. Create an account if you don't have one.
Step 2: Connect the opener to WiFi. Press the WiFi or smart home button on the motor unit (consult your manual for the exact button). The app will walk you through connecting the opener to your home network. Your garage needs a reliable WiFi signal for this to work. If your router is far from the garage, a WiFi extender placed halfway between the router and the opener helps significantly. The opener should be within about 50 feet of your router or extender.
Step 3: Pair the door sensor. Smart systems include a tilt sensor that mounts on the top panel of the garage door. This sensor tells the app whether the door is open or closed. Attach it with the included adhesive or screws, then pair it through the app.
Step 4: Configure notifications and schedules. Set up alerts for when the door opens or closes. Most apps let you schedule automatic closing (for example, close the door every night at 10 PM if it's still open). What I find most important is this auto-close scheduling. It eliminates the "did I leave the garage open?" worry entirely, and in my opinion it alone justifies the smart upgrade.
Step 5: Connect to your smart home ecosystem. myQ works with Amazon Key for in-garage delivery and integrates with Google Assistant. With an additional myQ Home Bridge, you can add Apple HomeKit and Siri support. Genie's Aladdin Connect works with Amazon Alexa directly. For broader smart home control, many openers also work with platforms like SmartThings and IFTTT.
If you're building out a connected home, pairing your garage opener with a smart lock on your front door gives you complete entry control from a single app ecosystem.
Common Mistakes to Avoid
Skipping the door balance test. I'd suggest treating this as a non-negotiable first step. An unbalanced door puts excessive strain on the opener motor and shortens its lifespan dramatically. If the door doesn't stay in place when you disconnect it and lift it halfway, fix the springs first.
Mounting into drywall instead of framing. The header bracket and ceiling mounts must connect to solid wood (joists, studs, or added blocking). Drywall anchors will eventually pull out under the repeated stress of daily door cycles. This is not a suggestion. It is a structural requirement.
Ignoring sensor alignment. Sensors that "mostly work" are not safe. The infrared beam must be unbroken and aligned precisely. If the door reverses inconsistently, keep adjusting until it reverses every single time.
Setting force too high. Cranking up the close force because the door "struggles" masks an underlying problem (usually a balance or track issue). High force settings can injure a person or pet caught under the door.
Using the wrong bulbs. Standard CFL or cheap LED bulbs can interfere with the radio frequency signal used by remotes and WiFi modules. Use bulbs specifically rated for garage door openers, or stick with rough-service incandescent bulbs if you experience range problems.
Forgetting to reprogram after replacement. If you removed an old opener, erase its codes and reprogram everything fresh. Rolling-code technology means old remotes should stop working, but resetting the system is best practice for security.
Running sensor wires across the floor. Route wires along the walls and ceiling, secured with cable staples. Wires on the floor get stepped on, driven over, and eventually severed.
When to Call a Pro
DIY installation saves money, but some situations genuinely require professional help.
Broken torsion springs. These springs are wound under hundreds of pounds of tension. A spring replacement gone wrong can cause catastrophic injury. This is the one garage door job that almost universally requires a professional.
Structural concerns. If your garage ceiling is finished with no accessible joists, or the framing above the door is damaged or inadequate, a professional can assess and reinforce the structure before mounting.
High-lift or vertical-lift doors. These commercial-style door configurations require specialized rail kits and different mounting geometry. The standard residential opener kit won't work without modifications.
Electrical work. If you need a new outlet installed on the ceiling for the opener, hire a licensed electrician. Running new circuits into a garage involves code requirements that vary by municipality.
You're unsure about anything. There's no shame in calling for help. A poorly installed garage door opener is a safety hazard. If you get partway through the install and something doesn't look right, stop and consult a professional rather than forcing it.
Recommended Products
Ready to buy? These are the top picks from our best garage door opener guide.
Chamberlain B6765T Secure View (Best Overall)
Chamberlain B6765T Secure View (Best Overall)
Homeowners who want a premium, full-featured garage door opener
Pros
- 1-1/4 HP equivalent handles the heaviest residential doors
- Built-in 1080p camera with night vision eliminates need for separate security camera
- 3,100-lumen LED lighting is the brightest in this roundup
- Battery backup and myQ smartphone control included
Cons
- Premium price compared to models without cameras
- myQ app requires account creation and occasionally pushes subscription features
- Camera is useful only if your Wi-Fi reaches the garage
Chamberlain B2405 (Best Value Belt Drive)
Chamberlain B2405 (Best Value Belt Drive)
Budget-conscious buyers who want belt drive quiet with smart features
Pros
- Most affordable belt drive opener with Wi-Fi in this roundup
- Wireless keypad included (a $30 to $50 value)
- Ultra-quiet belt drive operation
- Lifetime motor and belt warranty
Cons
- No battery backup for power outages
- No integrated camera
- 1/2 HP is underpowered for heavy insulated doors
Final Thoughts
Learning how to install a garage door opener is one of the more rewarding DIY skills you can pick up. I genuinely believe this project hits the sweet spot of being challenging enough to feel like an accomplishment while staying within reach of any motivated homeowner. The project saves real money, gives you a thorough understanding of how the system works, and takes less than a day for most replacement installations.
The keys to a successful opener installation are patience with the travel and force adjustments, solid structural mounting, and careful sensor alignment. Don't rush the testing phase. Run the door through at least a dozen full open-close cycles before you call it done, and verify that the safety reversal works every single time.
If you're still shopping for the right unit, our best garage door openers guide covers top picks for every drive type and budget. And if you're tackling other home upgrades while you're at it, a quality cordless drill will make this and dozens of future projects much smoother.
Affiliate Disclosure
This post contains affiliate links. As an Amazon Associate, HomeBuildLab earns from qualifying purchases at no additional cost to you. Learn more
Looking for the right tools and products?
Check out our product reviews and buying guides to find the best gear for your project.
Browse Reviews